How to build an app with Safe and ERC-7579
ERC-7579 support is still under development and should not be used in production environments. Please consider this tutorial and all the code examples in it a developer preview.
The smart account ecosystem was fragmented, with each provider building its own modules often incompatible with other smart account implementations. Developers had to build new modules compatible with their smart accounts or miss out on essential application features.
ERC-7579 (opens in a new tab) aims to ensure interoperability across implementations. It defines the account interface so developers can implement modules for all smart accounts that follow this standard. The Safe7579 Adapter makes your Safe compatible with any ERC-7579 modules. As a developer building with Safe, you get access to a rich ecosystem of modules to make your application feature-rich.
Let's say you want to build an app to enable scheduling transfers for monthly salaries to a team of contributors. However, Safe does not offer a native module for scheduling transfers. With the ERC-7579 compatibility, you can use Rhinestone's Scheduled Transfer module (opens in a new tab) with Safe to build an app to schedule transfers ahead of time.
This tutorial will teach you to build an app that can:
- Deploy an ERC-7579-compatible Safe Smart Account.
- Create a scheduled transaction.
- Execute it at the requested date and time.
Prerequisites
Prerequisite knowledge: You will need some basic experience with React (opens in a new tab), Next.js (opens in a new tab), ERC-4337 (opens in a new tab) and ERC-7579 (opens in a new tab).
Before progressing with the tutorial, please make sure you have:
- Downloaded and installed Node.js (opens in a new tab) and pnpm (opens in a new tab).
- Created an API key from Pimlico (opens in a new tab).
Note: If you wish to follow along using the completed project, you can check out the GitHub repository (opens in a new tab) for this tutorial.
1. Setup a Next.js application
Initialize a new Next.js app using pnpm with the following command:
_10pnpm create next-app
When prompted by the CLI:
- Select
yesto TypeScript, ESLint, and App router. - Select
noto all other questions (Tailwind,srcdirectory, and import aliases).
Install dependencies
For this project, we'll use Pimlico's Permissionless.js (opens in a new tab) to set up a Safe and interact with it, Rhinestone's Module SDK (opens in a new tab) to install and use core modules, and viem (opens in a new tab) for some helper functions.
As of now, permissionless.js can only be used to deploy single-signer Safe accounts. Multi-signature ERC-7579 Safes will be coming soon.
Run the following command to add all these dependencies to the project:
_10pnpm add permissionless viem @rhinestone/module-sdk
Now, create a file named .env.local at the root of your project, and add your Pimlico API key to it:
_10echo "NEXT_PUBLIC_PIMLICO_API_KEY='your_pimlico_api_key_goes_here'" > .env.local
Run the development server
Run the local development server with the following command:
_10pnpm dev
Go to http://localhost:3000 in your browser to see the default Next.js application.

2. Initialize permissionless client
Create a lib folder at the project root, and add a file permissionless.ts:
_10mkdir lib_10cd lib_10touch permissionless.ts
Add the code necessary to create Pimlico's smartAccountClient by adding this content to permissionless.ts :
_78import { Hex, createPublicClient, http, Chain, Transport } from 'viem'_78import { generatePrivateKey, privateKeyToAccount } from 'viem/accounts'_78import { sepolia } from 'viem/chains'_78import {_78 ENTRYPOINT_ADDRESS_V07,_78 createSmartAccountClient,_78 SmartAccountClient_78} from 'permissionless'_78import {_78 signerToSafeSmartAccount,_78 SafeSmartAccount_78} from 'permissionless/accounts'_78import { erc7579Actions, Erc7579Actions } from 'permissionless/actions/erc7579'_78import {_78 createPimlicoBundlerClient,_78 createPimlicoPaymasterClient_78} from 'permissionless/clients/pimlico'_78import { EntryPoint } from 'permissionless/types'_78_78export type SafeSmartAccountClient = SmartAccountClient<_78 EntryPoint,_78 Transport,_78 Chain,_78 SafeSmartAccount<EntryPoint>_78> &_78 Erc7579Actions<EntryPoint, SafeSmartAccount<EntryPoint>>_78_78const pimlicoUrl = `https://api.pimlico.io/v2/sepolia/rpc?apikey=${process.env.NEXT_PUBLIC_PIMLICO_API_KEY}`_78const safe4337ModuleAddress = '0x3Fdb5BC686e861480ef99A6E3FaAe03c0b9F32e2'_78const erc7569LaunchpadAddress = '0xEBe001b3D534B9B6E2500FB78E67a1A137f561CE'_78_78const privateKey =_78 (process.env.NEXT_PUBLIC_PRIVATE_KEY as Hex) ??_78 (() => {_78 const pk = generatePrivateKey()_78 console.log('Private key to add to .env.local:', `PRIVATE_KEY=${pk}`)_78 return pk_78 })()_78_78const signer = privateKeyToAccount(privateKey)_78_78const publicClient = createPublicClient({_78 transport: http('https://rpc.ankr.com/eth_sepolia')_78})_78_78const paymasterClient = createPimlicoPaymasterClient({_78 transport: http(pimlicoUrl),_78 entryPoint: ENTRYPOINT_ADDRESS_V07_78})_78_78const bundlerClient = createPimlicoBundlerClient({_78 transport: http(pimlicoUrl),_78 entryPoint: ENTRYPOINT_ADDRESS_V07_78})_78_78export const getSmartAccountClient = async () => {_78 const account = await signerToSafeSmartAccount(publicClient, {_78 entryPoint: ENTRYPOINT_ADDRESS_V07,_78 signer,_78 safeVersion: '1.4.1',_78 saltNonce: 120n,_78 safe4337ModuleAddress,_78 erc7569LaunchpadAddress_78 })_78_78 const smartAccountClient = createSmartAccountClient({_78 chain: sepolia,_78 account,_78 bundlerTransport: http(pimlicoUrl),_78 middleware: {_78 gasPrice: async () =>_78 (await bundlerClient.getUserOperationGasPrice()).fast,_78 sponsorUserOperation: paymasterClient.sponsorUserOperation_78 }_78 }).extend(erc7579Actions({ entryPoint: ENTRYPOINT_ADDRESS_V07 }))_78_78 return smartAccountClient as SafeSmartAccountClient_78}
It will:
- Load a
PRIVATE_KEYfrom.env.local(or generate one if it doesn't exist); - Create the
publicClient,paymasterClientandbundlerClientnecessary to initialize thepermissionlesslibrary; - Create an ERC-7579-compatible Safe Smart Account from the generated private key
- Pass the Safe Smart Account object to
createSmartAccountClientto generate a Permissionless client.
We can then call getSmartAccountClient() wherever we need to interact with the Safe via Pimlico.
3. Add Rhinestone module functionality
Create a new file scheduledTransfers.ts in the lib folder:
_10touch scheduledTransfers.ts
Add the code necessary to create a scheduled transfer using Rhinestone's ScheduledTransfers module:
_92import {_92 getScheduledTransactionData,_92 getInstallScheduledTransfersExecutor,_92 getCreateScheduledTransferAction_92} from '@rhinestone/module-sdk'_92_92import { SafeSmartAccountClient } from './permissionless'_92_92export interface ScheduledTransferDataInput {_92 startDate: number_92 repeatEvery: number_92 numberOfRepeats: number_92 amount: number_92 recipient: `0x${string}`_92}_92_92export const scheduledTransfersModuleAddress =_92 '0xF1aE317941efeb1ffB103D959EF58170F1e577E0'_92const sepoliaUSDCTokenAddress = '0x94a9d9ac8a22534e3faca9f4e7f2e2cf85d5e4c8'_92_92export const install7579Module = async (_92 safe: SafeSmartAccountClient,_92 scheduledTransferInput: ScheduledTransferDataInput_92) => {_92 const { startDate, repeatEvery, numberOfRepeats, amount, recipient } =_92 scheduledTransferInput_92 const scheduledTransaction = {_92 startDate,_92 repeatEvery,_92 numberOfRepeats,_92 token: {_92 token_address: sepoliaUSDCTokenAddress as `0x${string}`,_92 decimals: 6_92 },_92 amount,_92 recipient_92 }_92_92 const executionData = getScheduledTransactionData({_92 scheduledTransaction_92 })_92_92 const scheduledTransfersModule = getInstallScheduledTransfersExecutor({_92 executeInterval: repeatEvery,_92 numberOfExecutions: numberOfRepeats,_92 startDate,_92 executionData_92 })_92_92 const txHash = await safe.installModule({_92 type: 'executor',_92 address: scheduledTransfersModuleAddress,_92 context: scheduledTransfersModule.data as `0x${string}`_92 })_92_92 console.log(_92 'Scheduled transfers module is being installed: https://sepolia.etherscan.io/tx/' +_92 txHash_92 )_92_92 return txHash_92}_92_92export const scheduleTransfer = async (_92 safe: SafeSmartAccountClient,_92 scheduledTransferInput: ScheduledTransferDataInput_92) => {_92 const { startDate, repeatEvery, numberOfRepeats, amount, recipient } =_92 scheduledTransferInput_92 const scheduledTransaction = {_92 startDate,_92 repeatEvery,_92 numberOfRepeats,_92 token: {_92 token_address: sepoliaUSDCTokenAddress as `0x${string}`,_92 decimals: 6_92 },_92 amount,_92 recipient_92 }_92_92 const scheduledTransactionData = getCreateScheduledTransferAction({_92 scheduledTransaction_92 })_92 const txHash = await safe.sendTransaction({_92 to: scheduledTransactionData.target,_92 value: scheduledTransactionData.value as bigint,_92 data: scheduledTransactionData.callData_92 })_92_92 return txHash_92}
This file contains two functions:
install7579Modulewill install the module to a Safe and schedule its first transfer;scheduleTransferto schedule subsequent transfers in a Safe where the module has been previously installed.
In the UI, we can then detect whether the Safe has the module installed when a user tries to schedule a transfer. If not, it will run install7579Module; and if it does, it will run scheduleTransfer.
For brevity, we are only covering a simple use case of the ScheduledTransfers module. You can find more information about the module's functionalities in the Rhinestone documentation (opens in a new tab), such as the capacity to schedule recurring transfers, with a pre-determined number of repeats.
4. Add UI components
Now that we have the logic necessary to set up a safe and schedule a transfer, let's create a simple UI to interact with it. Create a new file ScheduledTransferForm.tsx in the components folder:
_10cd .._10mkdir components_10cd components_10touch ScheduledTransferForm.tsx
Add the following code to ScheduledTransferForm.tsx:
_155import { useState, useEffect } from 'react'_155_155import { SafeSmartAccountClient } from '@/lib/permissionless'_155import {_155 install7579Module,_155 scheduleTransfer,_155 scheduledTransfersModuleAddress_155} from '@/lib/scheduledTransfers'_155_155const ScheduledTransferForm: React.FC<{ safe: SafeSmartAccountClient }> = ({_155 safe_155}) => {_155 const [recipient, setRecipient] = useState('')_155 const [amount, setAmount] = useState(0)_155 const [date, setDate] = useState('')_155 const [txHash, setTxHash] = useState('')_155 const [loading, setLoading] = useState(false)_155 const [error, setError] = useState(false)_155 const [is7579Installed, setIs7579Installed] = useState(false)_155_155 useEffect(() => {_155 const init7579Module = async () => {_155 const isModuleInstalled = await safe_155 .isModuleInstalled({_155 type: 'executor',_155 address: scheduledTransfersModuleAddress,_155 context: '0x'_155 })_155 .catch(() => false)_155 if (isModuleInstalled) {_155 setIs7579Installed(true)_155 }_155 }_155 void init7579Module()_155 }, [safe])_155_155 return (_155 <>_155 <div style={{ marginTop: '40px' }}>Your Safe: {safe.account.address}</div>{' '}_155 <div style={{ marginTop: '10px' }}>_155 ERC-7579 module installed:{' '}_155 {is7579Installed_155 ? 'Yes ✅'_155 : 'No, schedule a transfer below to install it!'}{' '}_155 </div>_155 <div_155 style={{_155 width: '100%',_155 display: 'flex',_155 justifyContent: 'space-between',_155 alignItems: 'center',_155 marginTop: '40px',_155 marginBottom: '40px'_155 }}_155 >_155 <div>_155 <label htmlFor='address'>Address:</label>_155 <input_155 style={{ marginLeft: '20px' }}_155 id='address'_155 placeholder='0x...'_155 onChange={e => setRecipient(e.target.value)}_155 value={recipient}_155 />_155 </div>_155 <div>_155 <label htmlFor='amount'>Amount (integer):</label>_155 <input_155 style={{ marginLeft: '20px' }}_155 id='amount'_155 type='number'_155 placeholder='1'_155 min='0'_155 onChange={e => setAmount(Number(e.target.value))}_155 value={amount}_155 />_155 </div>_155 <div>_155 <label htmlFor='date'>Date/Time:</label>_155 <input_155 style={{ marginLeft: '20px' }}_155 id='date'_155 type='datetime-local'_155 onChange={e => setDate(e.target.value)}_155 value={date}_155 />_155 </div>_155_155 <button_155 disabled={!recipient || !amount || !date || loading}_155 onClick={async () => {_155 setLoading(true)_155 setError(false)_155 const startDate = new Date(date).getTime() / 1000_155 const transferInputData = {_155 startDate: 1710759572,_155 repeatEvery: 60 * 60 * 24,_155 numberOfRepeats: 1,_155 amount,_155 recipient: recipient as `0x${string}`_155 }_155_155 await (!is7579Installed ? install7579Module : scheduleTransfer)(_155 safe,_155 transferInputData_155 )_155 .then(txHash => {_155 setTxHash(txHash)_155 setLoading(false)_155 setRecipient('')_155 setAmount(0)_155 setDate('')_155 setIs7579Installed(true)_155 })_155 .catch(err => {_155 console.error(err)_155 setLoading(false)_155 setError(true)_155 })_155 }}_155 >_155 Schedule Transfer_155 </button>_155 </div>_155 <div>_155 {loading ? <p>Processing, please wait...</p> : null}_155 {error ? (_155 <p>_155 There was an error processing the transaction. Please try again._155 </p>_155 ) : null}_155 {txHash ? (_155 <>_155 <p>_155 Success!{' '}_155 <a_155 href={`https://sepolia.etherscan.io/tx/${txHash}`}_155 target='_blank'_155 rel='noreferrer'_155 style={{_155 textDecoration: 'underline',_155 fontSize: '14px'_155 }}_155 >_155 View on Etherscan_155 </a>_155 </p>_155 </>_155 ) : null}_155 </div>_155 </>_155 )_155}_155_155export default ScheduledTransferForm
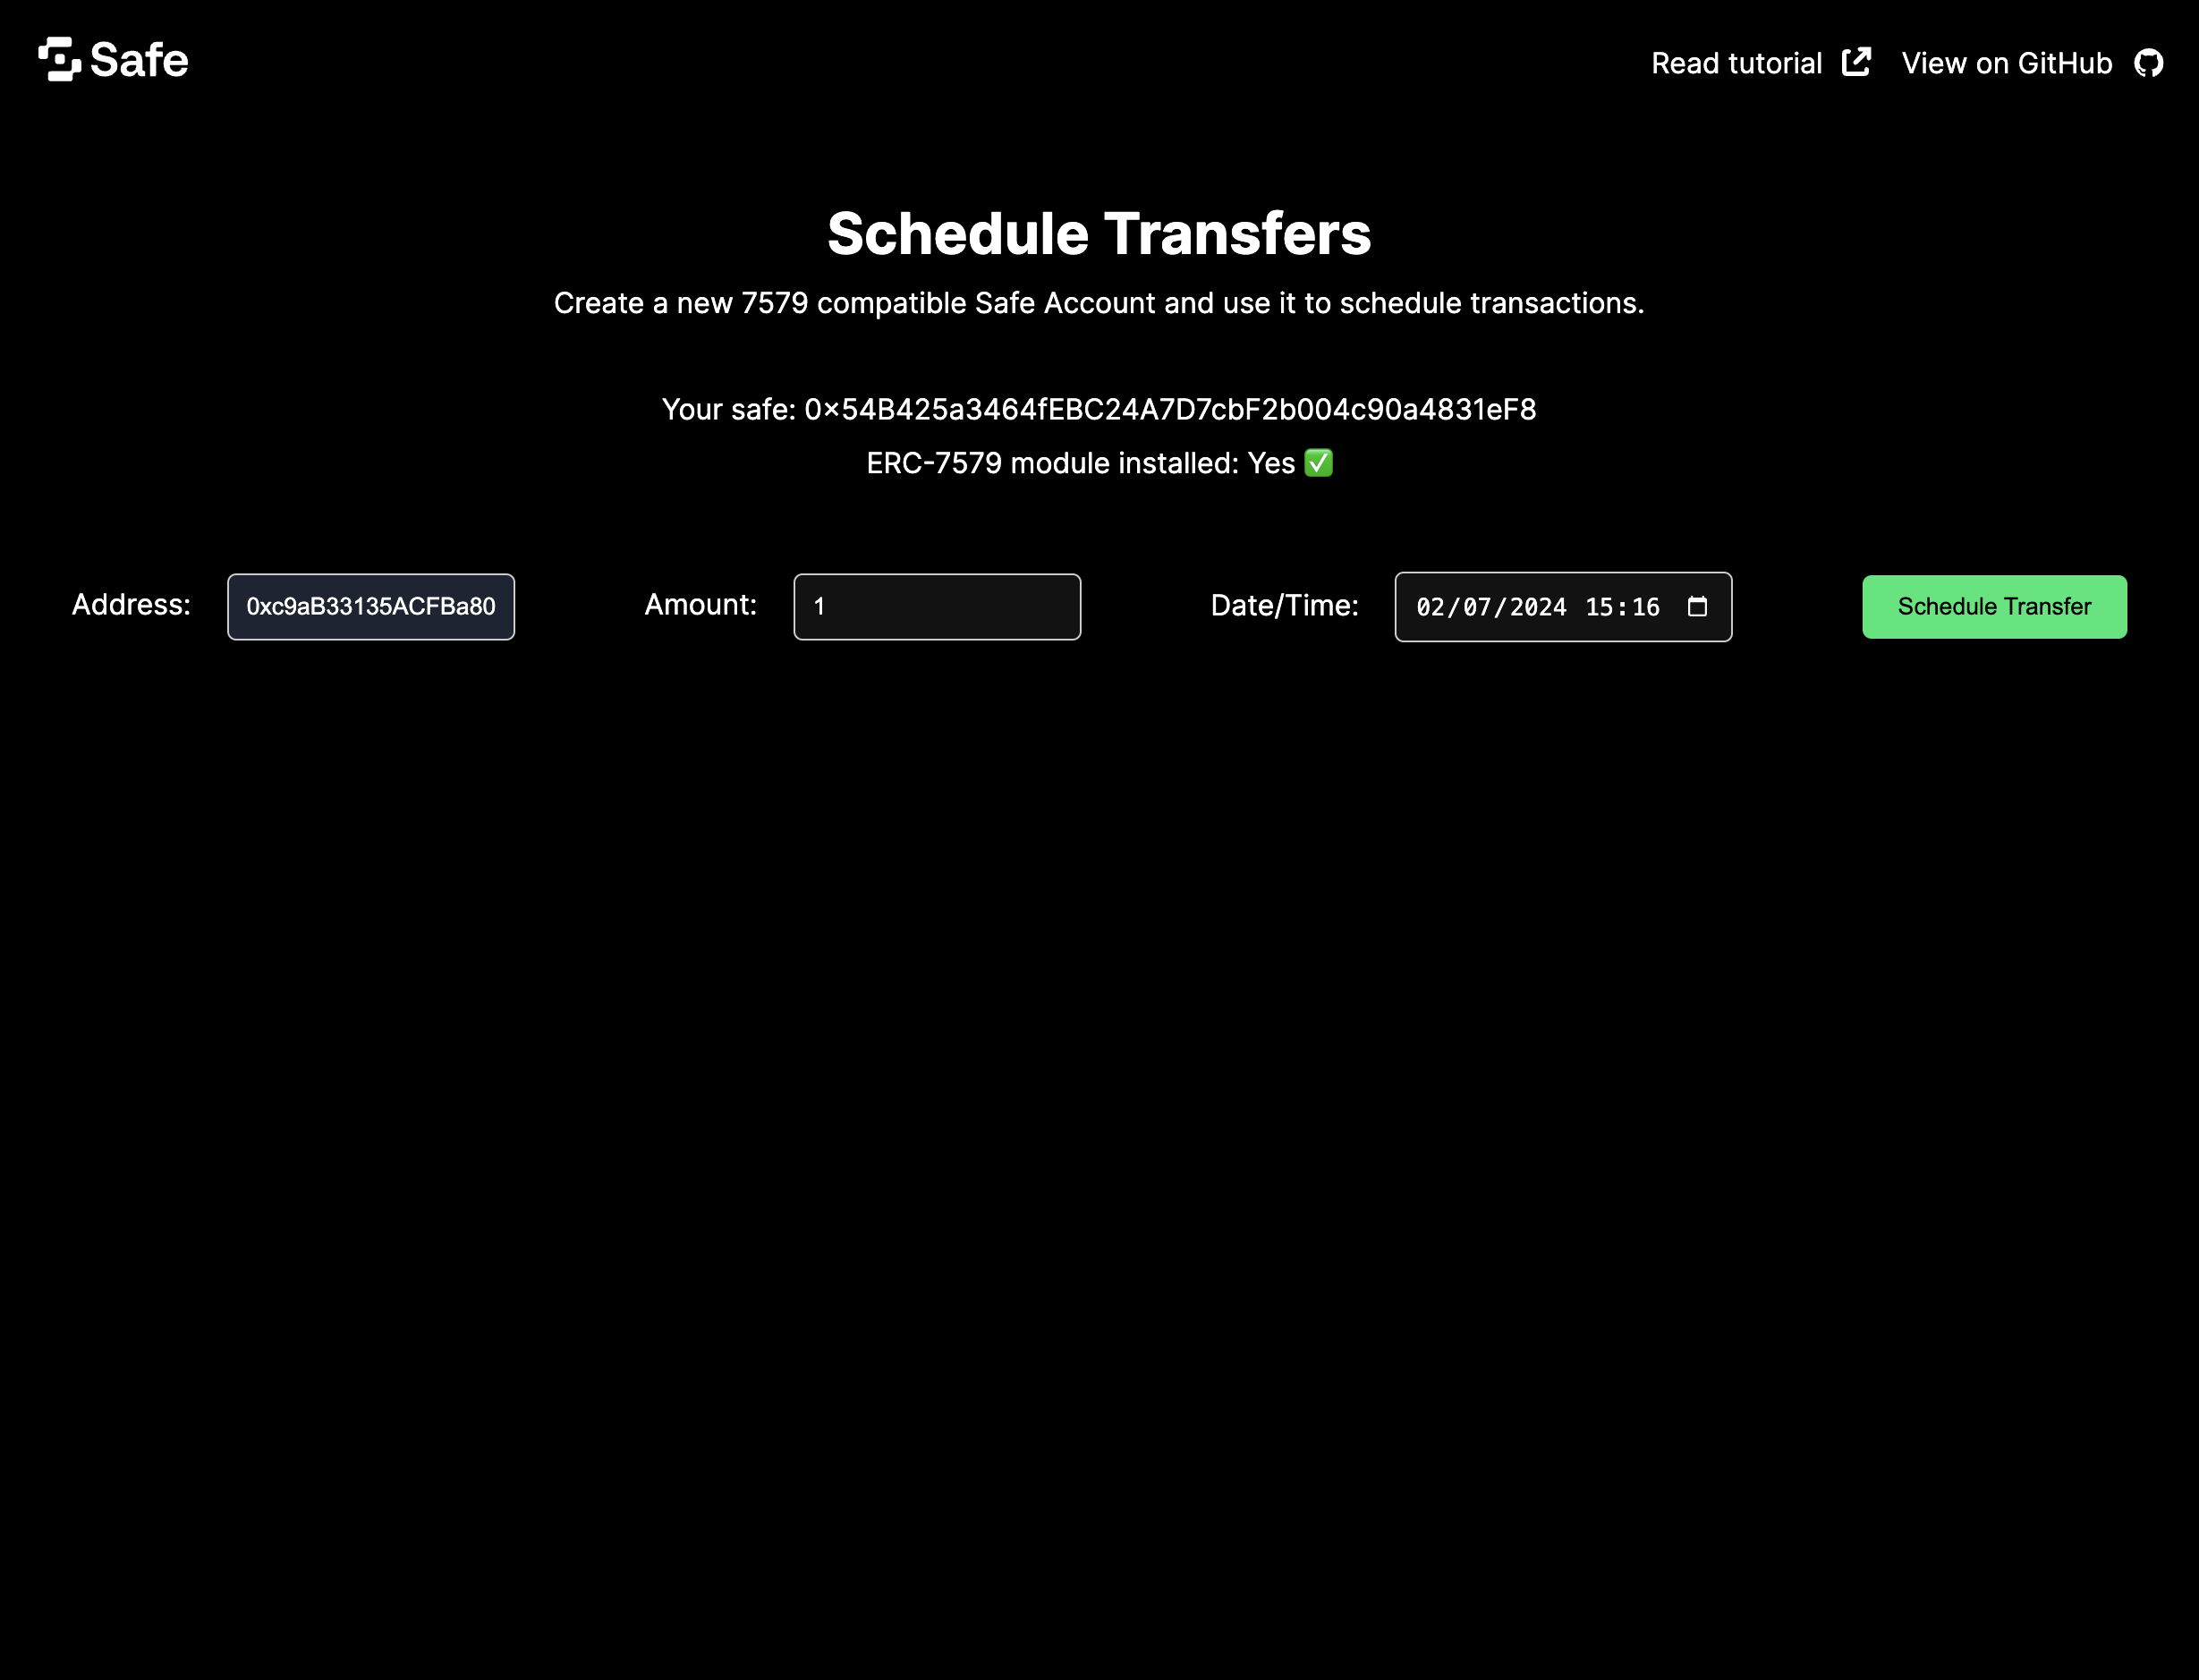
This component will provide a form to allow the user to input the amount, receiver address, and date and time for the scheduled transfer. It will detect whether the Safe has the module installed, and then call either install7579Module or scheduleTransfer from the scheduledTransfers.ts file.
Now, edit app/page.tsx to include the ScheduledTransferForm component:
_32'use client'_32_32import { useState } from 'react'_32_32import {_32 getSmartAccountClient,_32 type SafeSmartAccountClient_32} from '../lib/permissionless'_32import ScheduledTransferForm from '../components/ScheduledTransferForm'_32_32export default function Home () {_32 const [safe, setSafe] = useState<SafeSmartAccountClient | undefined>()_32_32 const handleLoadSafe = async () => {_32 const safe = await getSmartAccountClient()_32 setSafe(safe)_32 }_32_32 return (_32 <>_32 {safe == null ? (_32 <>_32 <button onClick={handleLoadSafe} style={{ marginTop: '40px' }}>_32 Create Safe_32 </button>_32 </>_32 ) : (_32 <ScheduledTransferForm safe={safe} />_32 )}_32 </>_32 )_32}
5. Add styling (optional)
We can add some styling to our app by editing the contents of layout.tsx in app folder:
_87import type { Metadata } from 'next'_87import { Inter } from 'next/font/google'_87import Img from 'next/image'_87import './globals.css'_87_87const inter = Inter({ subsets: ['latin'] })_87_87export const metadata: Metadata = {_87 title: 'Safe Tutorial: ERC-7579',_87 description: 'Generated by create next app'_87}_87_87export default function RootLayout ({_87 children_87}: Readonly<{_87 children: React.ReactNode_87}>) {_87 return (_87 <html lang='en'>_87 <body className={inter.className}>_87 <nav_87 style={{_87 display: 'flex',_87 justifyContent: 'space-between',_87 padding: '1rem'_87 }}_87 >_87 <a href='https://safe.global'>_87 <Img width={95} height={36} alt='safe-logo' src='/safe.svg' />_87 </a>_87 <div style={{ display: 'flex' }}>_87 <a_87 href='https://docs.safe.global/advanced/erc-7579/tutorials/7579-tutorial'_87 style={{_87 display: 'flex',_87 alignItems: 'center',_87 marginRight: '1rem'_87 }}_87 >_87 Read tutorial{' '}_87 <Img_87 width={20}_87 height={20}_87 alt='link-icon'_87 src='/external-link.svg'_87 style={{ marginLeft: '0.5rem' }}_87 />_87 </a>_87 <a_87 href='https://github.com/5afe/safe-tutorial-7579'_87 style={{ display: 'flex', alignItems: 'center' }}_87 >_87 View on GitHub{' '}_87 <Img_87 width={24}_87 height={24}_87 alt='github-icon'_87 src='/github.svg'_87 style={{ marginLeft: '0.5rem' }}_87 />_87 </a>_87 </div>_87 </nav>_87 <div style={{ width: '100%', textAlign: 'center' }}>_87 <h1>Schedule Transfers</h1>_87_87 <div>_87 Create a new ERC-7579-compatible Safe Smart Account and use it to schedule_87 transactions._87 </div>_87 </div>_87 <div_87 style={{_87 display: 'flex',_87 alignItems: 'center',_87 justifyContent: 'space-between',_87 marginLeft: '40px',_87 marginRight: '40px',_87 flexDirection: 'column'_87 }}_87 >_87 {children}_87 </div>_87 </body>_87 </html>_87 )_87}
This will add some basic styling to the app, including a header. You can also add some custom CSS to globals.css in the same folder:
_28h1,_28h2,_28h3 {_28 margin-top: 40px;_28 margin-bottom: 10px;_28}_28_28button {_28 cursor: pointer;_28 border: none;_28 background: #00e673;_28 color: black;_28 padding: 10px 20px;_28 border-radius: 5px;_28 margin: 10px 0;_28}_28_28input {_28 padding: 10px;_28 border-radius: 5px;_28 border: 1px solid #ccc;_28 margin: 10px 0;_28}_28_28button:disabled {_28 background: #ccc;_28 color: #666;_28}
Testing your app
That's it! You can find the source code for the example created in this tutorial on GitHub (opens in a new tab). You can now return to your browser and see the app displayed.
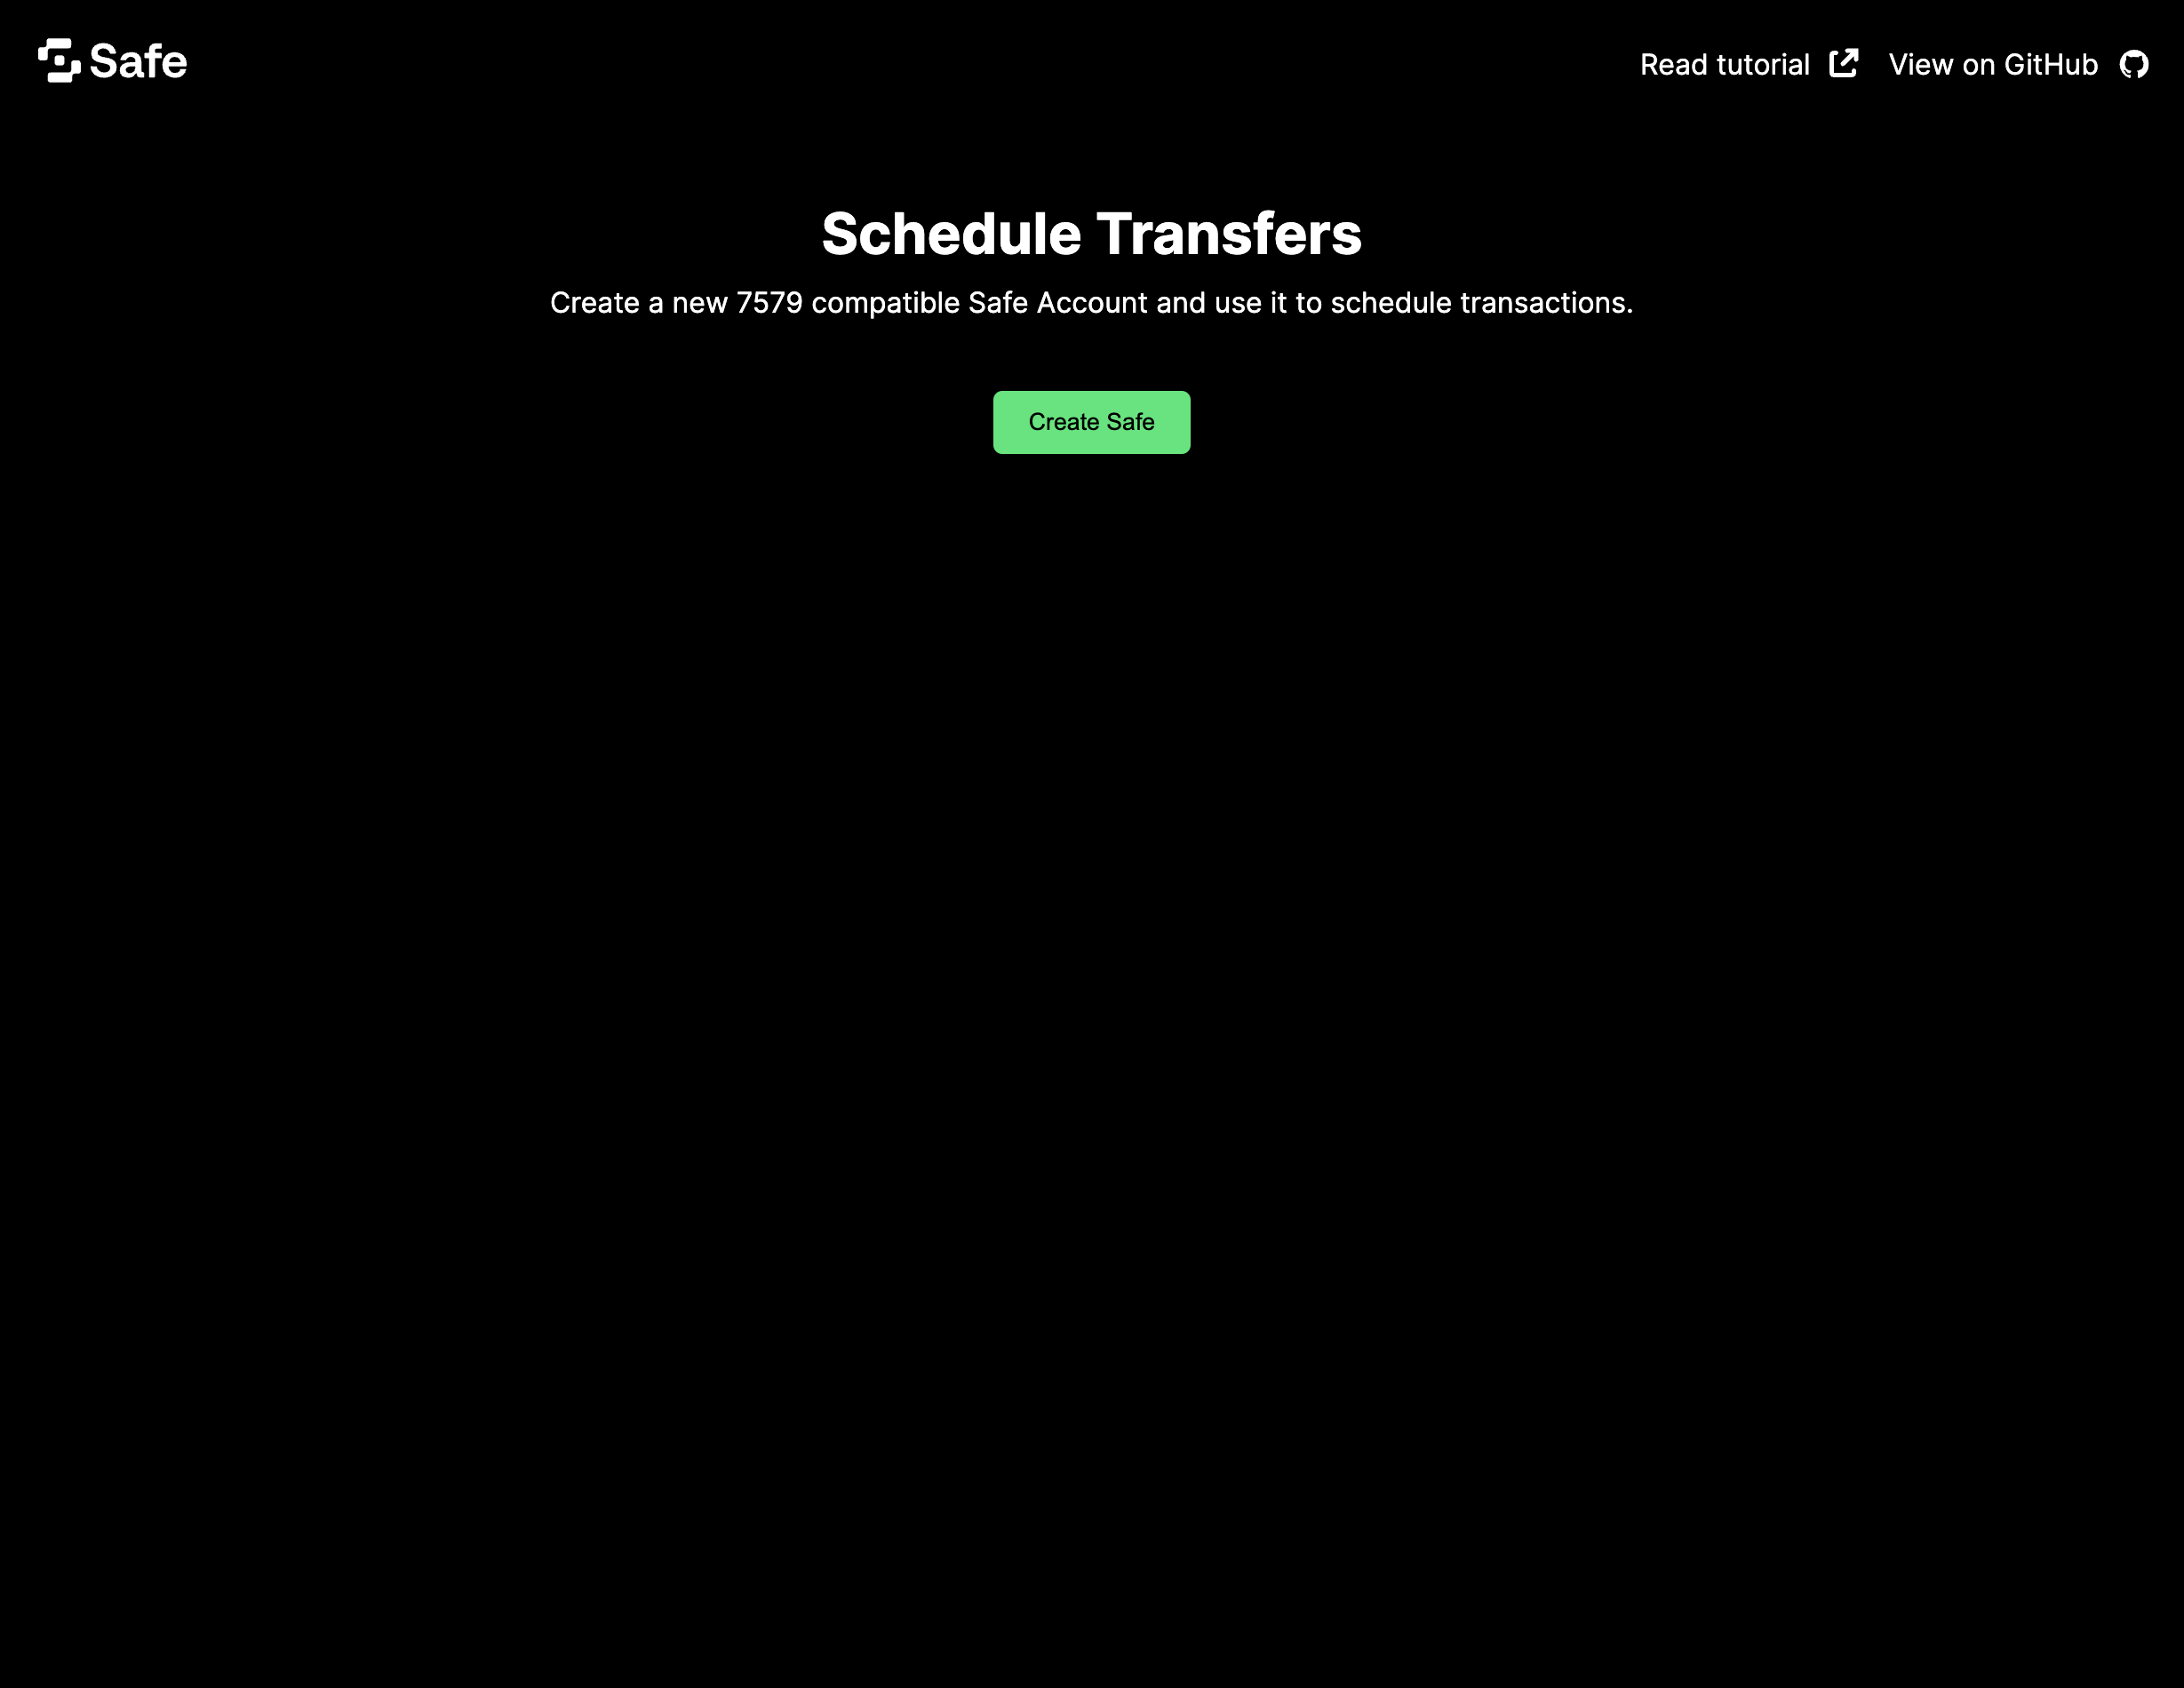
Click the Create Safe button to initialize the Permissionless client with the private key you stored on .env.local. It will deploy an ERC-7579-compatible Safe Smart Account on its first transaction.
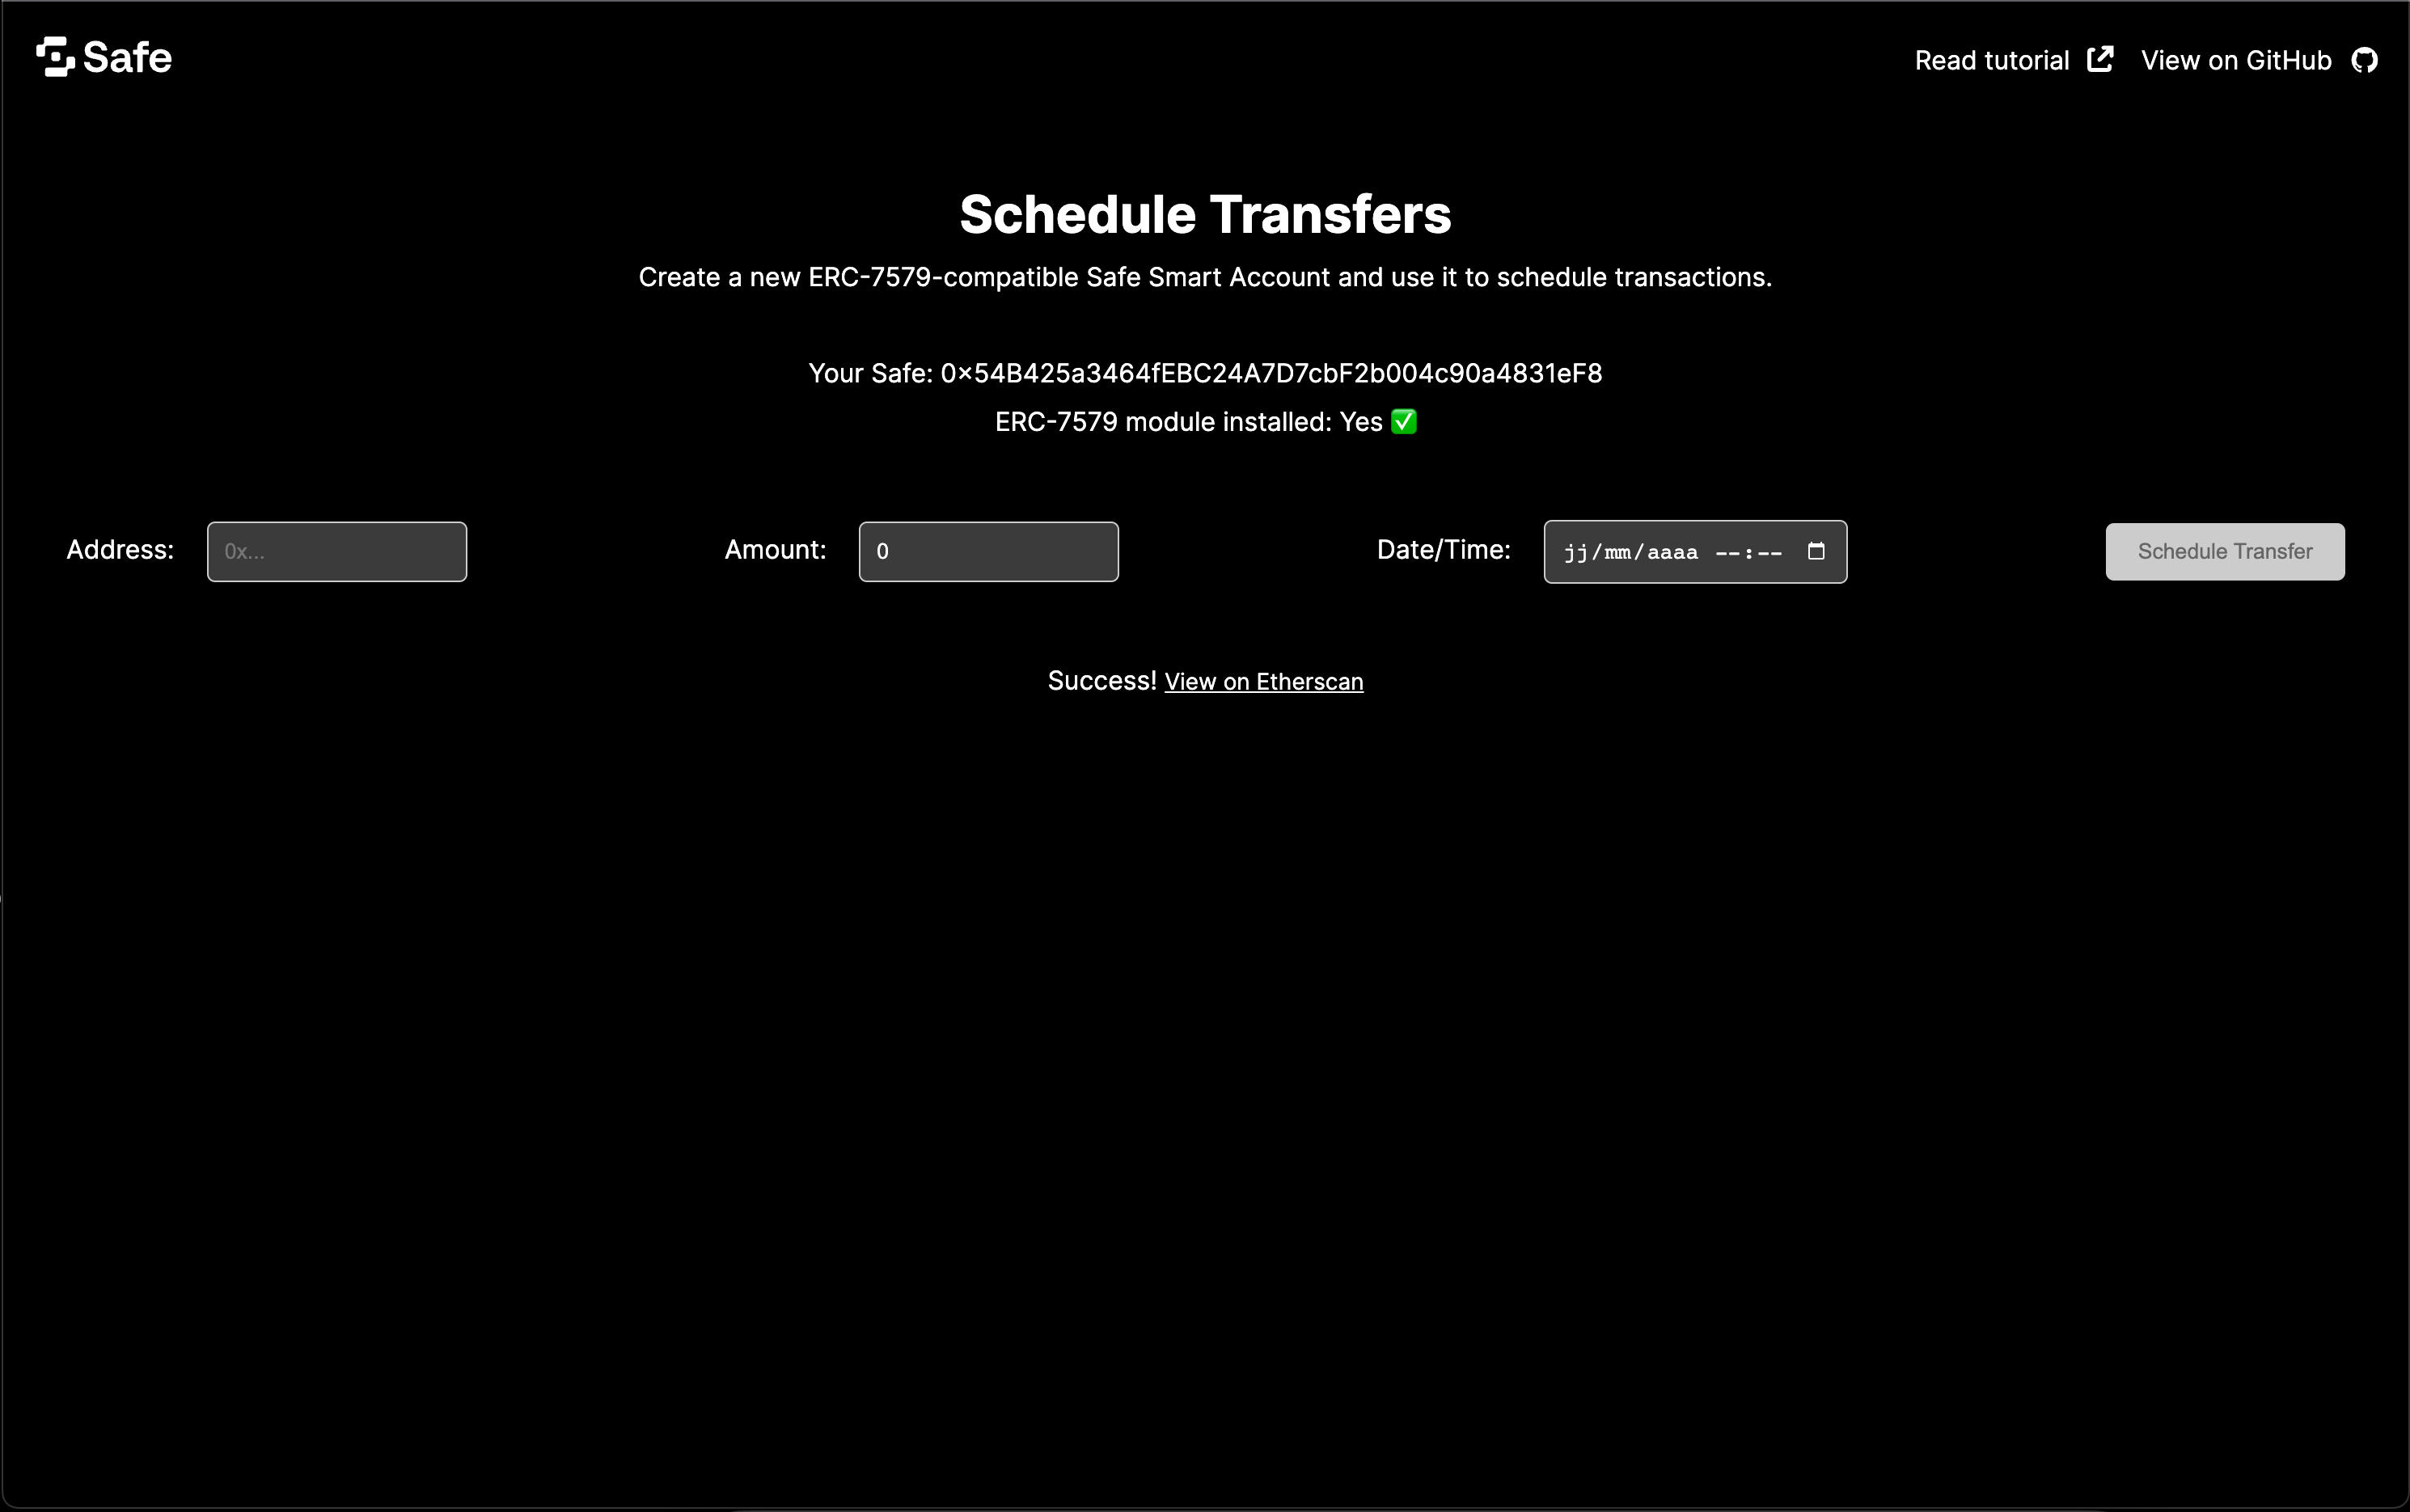
Once loaded, you will be able to choose an amount to send, a receiver address and select a date and time for your scheduled payment. Click Schedule Transfer to send the transaction. The first time you do this, it will deploy the Safe to Sepolia test network and install the ScheduledTransfers module.
Do more with Safe and ERC-7579
We learned how to deploy an ERC-7579-compatible Safe Smart Account and use an ERC-7579-compatible module, the Scheduled Transfer from Rhinestone. We hope you enjoyed this tutorial and that the combination of Safe and 7579 will allow you to tap into new functionalities for your decentralized apps.
As a next step, you can add more functionalities to your app using other ERC-7579-compatible modules (opens in a new tab). Here are some ideas:
- Create a dead man switch (opens in a new tab) in case your account becomes inactive after a certain amount of time.
- Add multi-factor validation (opens in a new tab) to your Smart Account.
- Designate an owner (opens in a new tab) that can act on your behalf for executing transactions and paying for gas.
You can also find more inspiration on this list of ERC-7579 modules (opens in a new tab). You can also read more about this ERC in our overview (opens in a new tab) or in the official documentation (opens in a new tab).
Did you encounter any difficulties? Let us know by opening an issue (opens in a new tab) or asking a question on Stack Exchange (opens in a new tab) with the safe-core tag.